


Table of Contents
ToggleA driveway sensor alarm acts as an early warning system, alerting homeowners the moment a vehicle or person approaches the property. Unlike traditional security cameras that require constant monitoring, these devices actively notify residents of activity, whether it’s a delivery driver, unexpected visitor, or potential intruder. For homes with long driveways, rural properties, or simply anyone who wants a heads-up before someone reaches the front door, a driveway sensor provides an extra layer of awareness and control. The technology has evolved significantly, with modern systems offering wireless installation, adjustable sensitivity, and integration with smart home platforms.
Key Takeaways
- A driveway sensor alarm provides real-time alerts when vehicles or people approach your property, offering early warning without the need for constant monitoring.
- Three main detection methods—passive infrared (PIR), magnetic probe, and break-beam sensors—each serve different needs, with PIR sensors best for mixed-use driveways and magnetic probes ideal for vehicle-only detection.
- Wireless driveway sensor systems are typically easier to install as DIY projects, requiring no trenching or permits, and cost $40–$200 depending on sensor type and features.
- Key features to prioritize include adjustable sensitivity to prevent false alarms, adequate transmission range for your property size, weather resistance (IP65 rating), and battery or solar power options that fit your maintenance preferences.
- Common installation mistakes like mounting sensors too high or aiming them at reflective surfaces can be avoided by testing placement before permanent setup and conducting thorough week-long testing in various conditions.
- Troubleshooting intermittent issues typically involves checking battery voltage, cleaning sensor lenses, adjusting sensitivity settings, and relocating the receiver away from interference sources like appliances and metal structures.
What Is a Driveway Sensor Alarm and How Does It Work?
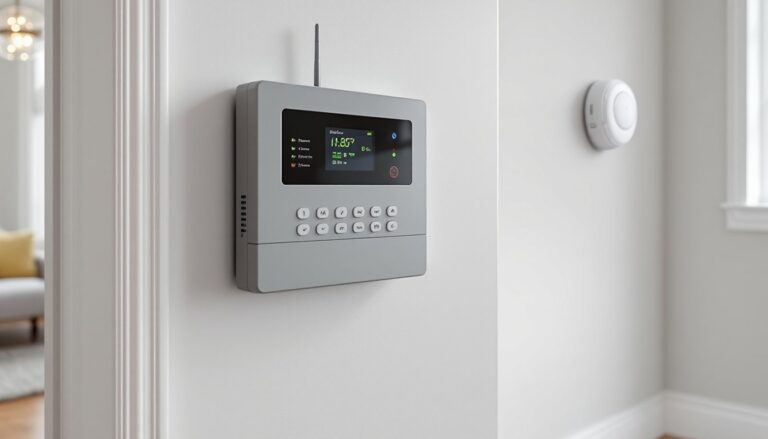
A driveway sensor alarm is a detection system that monitors entry points to a property and triggers an alert when movement is detected. The system typically consists of two main components: a sensor unit installed near the driveway and a receiver unit placed inside the home that emits an audible chime, visual alert, or push notification.
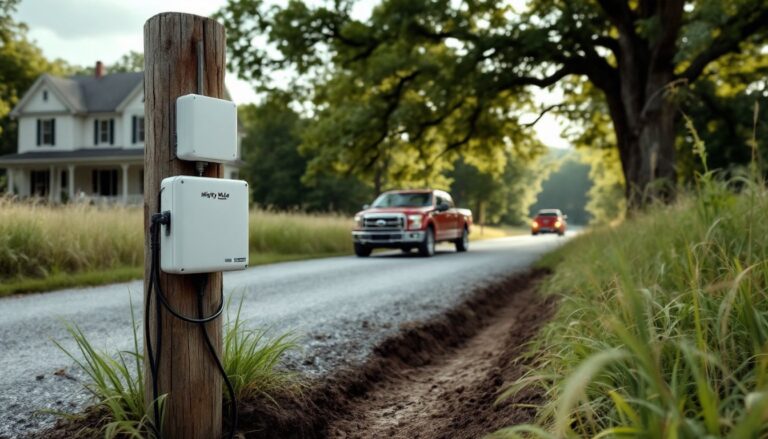
Most systems use one of three detection methods. Passive infrared (PIR) sensors detect heat signatures from vehicles and people, making them ideal for driveways where you want to differentiate between animals and actual threats. Magnetic probe sensors are buried beneath the driveway surface and detect the metal mass of vehicles passing overhead, these won’t trigger for pedestrians or wildlife. Break-beam sensors create an invisible infrared line across the driveway: when that beam is interrupted, the alarm activates.
The sensor wirelessly transmits a signal (usually at 433 MHz or using WiFi) to the indoor receiver, which can be a standalone chime box, a smart home hub, or a smartphone app. Detection range varies by model but typically extends from 20 to 40 feet from the sensor unit. Wireless transmission range between sensor and receiver usually reaches 400 to 1,000 feet in open space, though walls and interference reduce this distance.
Power sources differ by type. Battery-powered sensors offer flexible placement but require periodic replacement, expect 6 to 12 months per set of batteries depending on traffic volume. Solar-powered units with battery backup eliminate maintenance but need adequate sunlight exposure. Wired systems require 12V to 24V power runs from the house or a nearby outlet, adding installation complexity but removing battery concerns entirely.
Why Install a Driveway Sensor Alarm at Your Home?
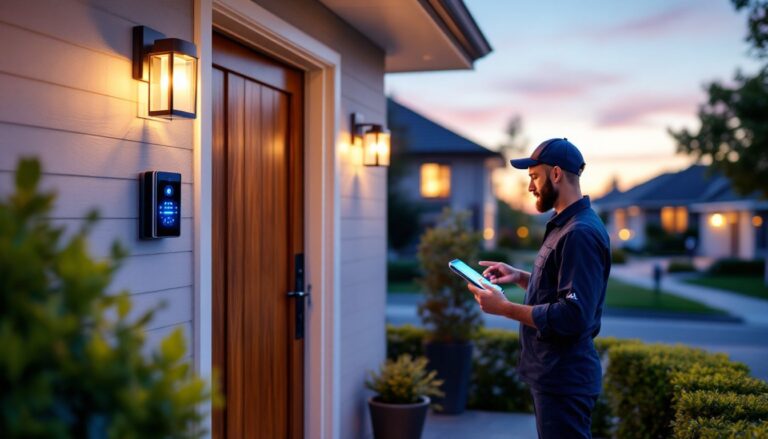
Driveway sensors deliver practical benefits beyond basic security. They provide advance notice of arrivals, giving homeowners time to pause activities, put away tools, or simply prepare to greet visitors. For properties with barking dogs, the alert lets owners intervene before the dog reacts to a knock at the door.
Rural homeowners and those with long driveways gain the most utility. If your front door sits 100 yards from the street, you won’t hear vehicles approaching. A sensor bridges that gap, functioning as an extended doorbell. Small business owners operating from home, contractors, consultants, or anyone receiving frequent deliveries, appreciate knowing when clients or packages arrive without constantly watching windows.
Security applications matter too. Home security experts at Good Housekeeping note that early detection systems deter opportunistic crime by removing the element of surprise. An alert gives residents time to observe approaching vehicles, verify expected visitors, or contact authorities if something seems off. This doesn’t replace a comprehensive security system but complements cameras and lighting by providing real-time awareness.
For families with young children or elderly members who may wander, a driveway sensor acts as an additional safeguard. If someone unexpectedly leaves through a side door toward the driveway, the sensor alerts caregivers. Some parents also use them to know when teenage drivers arrive home safely.
Installation doesn’t require permits or professional licensing in most jurisdictions since these are low-voltage notification devices, not structural or life-safety systems. That makes them accessible DIY projects with immediate functional payoff.
Types of Driveway Sensor Alarms: Which One Is Right for You?
Choosing the right sensor type depends on your property layout, traffic patterns, and what you want to detect.
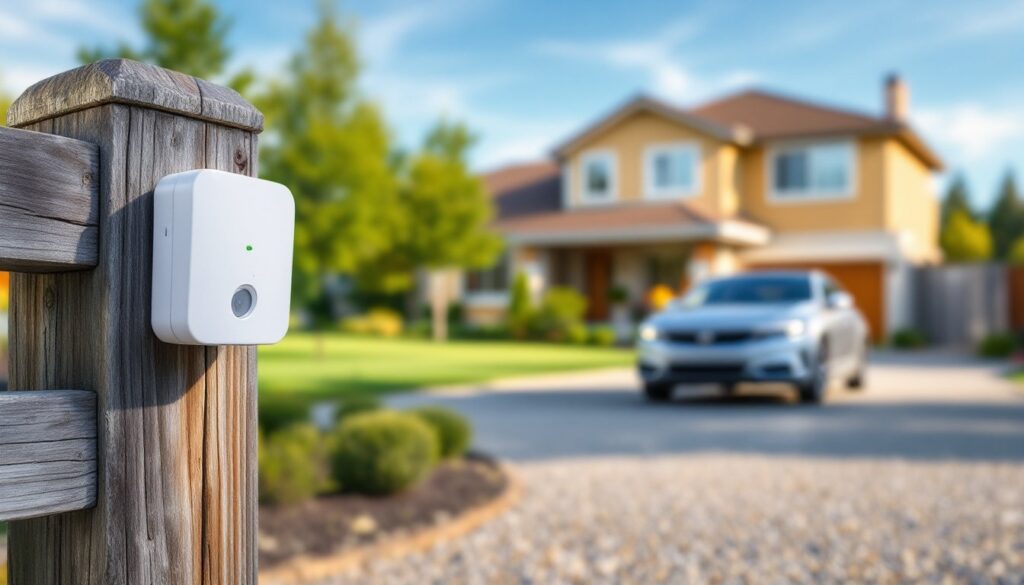
Passive infrared (PIR) sensors work best for mixed-use driveways where both vehicles and pedestrians need detection. They sense heat changes within their field of view, typically covering a 30-foot detection radius. PIR sensors mount above ground on posts, trees, or existing structures, making installation straightforward. The downside: they can trigger from large animals, windblown branches, or direct sunlight hitting the lens. Quality units include adjustable sensitivity settings to minimize false alarms. Expect to pay $40 to $120 for a basic wireless PIR system.
Magnetic probe sensors install beneath the driveway surface, either buried in gravel or under asphalt/concrete. They detect the ferrous metal in vehicles, ignoring pedestrians and animals entirely. This makes them ideal for properties where vehicle-only detection matters, like monitoring a secondary driveway or service entrance. Installation requires digging a trench or drilling through pavement to a depth of 2 to 4 inches, then running a wire from the probe to the transmitter box. Probe sensors cost $150 to $300 but deliver the lowest false-alarm rate. These systems work well where motion sensor alarm coverage needs to be vehicle-specific.
Break-beam sensors use two units mounted opposite each other, creating an invisible infrared line. When the beam is broken, the alarm triggers. They’re highly accurate but require mounting points on both sides of the driveway, posts, trees, or gate columns. Detection is instantaneous with virtually no false positives, but alignment is critical. Prices range from $80 to $200 depending on beam distance capability.
Wireless vs. Wired Systems
Wireless systems dominate the residential market due to ease of installation. The sensor unit runs on batteries or solar power, transmitting radio signals to a plug-in receiver inside the home. Installation typically takes under an hour with no trenching or conduit runs required. The trade-off is signal reliability, metal structures, thick walls, and electronic interference can disrupt transmission. Range extenders or WiFi-based systems solve this but add cost.
Wired systems require running low-voltage wire (typically 18/2 or 16/2 stranded) from the sensor location to the house. This means trenching at least 6 inches deep below driveways or lawns, or running conduit along fences or structures. The upside is rock-solid reliability and no battery maintenance. Wired systems make sense for new construction, major landscaping projects where trenching is already happening, or properties with existing conduit runs. Installation difficulty jumps significantly, budget a half day for trenching, wire pulling, and termination. Technology reviewers at Tom’s Guide often recommend wired systems for permanent installations where reliability outweighs convenience.
For most homeowners tackling this as a DIY project, wireless PIR or break-beam sensors deliver the best balance of performance, cost, and installation simplicity.
Key Features to Look for When Choosing a Driveway Sensor Alarm
Not all driveway sensors deliver the same functionality. Focus on these features when comparing models.
Detection range and coverage area determine what the sensor can monitor. PIR sensors typically cover 30 to 40 feet in a cone-shaped pattern, while magnetic probes work within 8 to 12 feet of the buried sensor. Match the coverage to your driveway width and approach angle. Narrow driveways need less range: wide circular drives may require multiple sensors.
Adjustable sensitivity prevents false alarms from pets, wildlife, or blowing debris. Better systems offer multiple sensitivity levels or detection zone adjustments. This feature matters most for PIR sensors, which can be overly sensitive in default settings.
Transmission range between sensor and receiver needs to exceed your property dimensions. Manufacturers list open-air range, but walls, metal siding, and appliances cut that distance substantially. If your house sits 300 feet from the road, a system rated for 500-foot transmission provides margin for signal interference. WiFi-enabled sensors bypass range issues by using home networks but depend on router placement and signal strength.
Power source impacts maintenance. Battery-powered units offer flexible placement but require checking and replacing batteries annually. Solar-powered sensors with rechargeable battery backup eliminate this chore if placement allows adequate sun exposure, minimum 4 hours of direct sunlight recommended. Plug-in or wired sensors require power availability at the installation point.
Alert customization improves usability. Look for systems that offer multiple chime tones, adjustable volume, or the ability to pair with multiple receivers throughout the house. Some advanced systems send push notifications to smartphones or integrate with smart home platforms like Alexa or Google Home, announcing “Driveway sensor activated” through connected speakers.
Weather resistance is non-negotiable for outdoor sensors. Check for an IP rating of IP65 or higher, indicating protection from rain, dust, and temperature extremes. Operating temperature ranges typically span -4°F to 140°F, suitable for most North American climates.
Multi-zone capability allows one receiver to monitor multiple sensors, each with a distinct alert tone. This helps differentiate between front driveway, back gate, and side path activity. Expandable systems start around $100 and support 2 to 4 sensors per receiver.
DIY Installation: Step-by-Step Setup Guide
Installing a wireless driveway sensor alarm is a straightforward DIY project requiring basic tools and about an hour of work. Here’s how to do it right.
Tools and materials needed:
- Cordless drill with masonry and wood bits (if mounting to posts or walls)
- Level
- Measuring tape
- Screwdriver
- Wire strippers (for wired systems)
- Post-hole digger or shovel (if installing a dedicated mounting post)
- Safety glasses and work gloves
Step-by-step installation:
-
Choose sensor placement. Position the sensor where it has a clear line of sight across the driveway at the point you want detection to occur. For PIR sensors, mount 2 to 4 feet above ground level, aimed slightly downward to capture vehicle and pedestrian heat signatures. Avoid pointing sensors toward direct sunlight, reflective surfaces, or heat sources like HVAC vents. Test placement before permanent mounting by temporarily positioning the sensor and walking the detection pattern.
-
Install the sensor mount. Most wireless sensors include mounting brackets for attachment to existing structures, fence posts, trees (minimum 4-inch diameter), or walls. Use a level to ensure the sensor sits plumb. If no suitable mounting point exists, install a 4×4 post set 2 feet deep in concrete, allowing 24 hours for curing before sensor installation. For magnetic probe sensors, dig a trench 2 to 3 inches deep and 6 to 8 inches wide across the driveway at the desired detection point. Lay the probe perpendicular to traffic flow and cover with soil or gravel, compacting firmly.
-
Power the sensor. Insert batteries (typically AA or C-cell) or position solar panels for maximum sun exposure, facing south in the northern hemisphere. Wired sensors require running 18/2 low-voltage wire through conduit from the sensor location to the power source, terminating connections according to manufacturer diagrams. Bury conduit at least 6 inches deep under driveways per National Electrical Code (NEC) Article 300 for low-voltage wiring, though local codes may vary, check with your jurisdiction.
-
Set up the receiver. Plug the receiver unit into an outlet centrally located in the home where the alert will be easily heard. For multi-story homes, consider placing receivers on each level or using systems with smartphone app integration for whole-home coverage. Power on the receiver and test signal strength by triggering the sensor, most receivers have LED indicators confirming signal reception.
-
Adjust sensitivity and settings. Trigger the sensor by walking or driving through the detection zone. If false alarms occur from small animals or wind, reduce sensitivity incrementally. If detection is inconsistent, increase sensitivity or adjust the sensor angle. Some systems include a test mode that allows adjustment without waiting for the alert timeout period between triggers.
-
Test thoroughly. Conduct testing at different times of day and in various weather conditions. Walk, drive, and approach from multiple angles to verify consistent detection. Confirm transmission reaches the receiver reliably from the sensor’s installed position, metal roofing, thick masonry walls, or appliance interference can block signals. Guidance from Popular Mechanics suggests testing wireless systems over a full week to catch intermittent issues before considering the installation complete.
Common installation mistakes to avoid: mounting sensors too high (reducing detection range), aiming PIR sensors at reflective surfaces (causing false triggers), neglecting to weatherproof battery compartments, and failing to account for seasonal foliage growth that may eventually block sensor lines of sight.
Troubleshooting Common Driveway Sensor Alarm Issues
Even properly installed systems occasionally develop problems. Here’s how to diagnose and fix the most common issues.
Sensor not triggering: Check battery voltage first, most sensors fail silently when batteries drop below operating threshold. Verify nothing blocks the sensor’s field of view, vegetation grows quickly in spring and summer. For PIR sensors, confirm the lens is clean: dirt, spider webs, and pollen reduce sensitivity significantly. Magnetic probe sensors may have shifted position if heavy vehicles compacted surrounding soil, probe depth should remain consistent at 2 to 3 inches below surface. Re-test sensitivity settings: factory resets sometimes occur after battery replacement.
False alarms: Overly sensitive settings cause most false triggers. Start by reducing sensitivity one level at a time. PIR sensors may react to heat sources like air conditioner exhaust, direct sunlight warming pavement, or even large birds perching nearby. Reposition the sensor to avoid these triggers or install a sun shield on the sensor housing. Check for loose mounting, vibration from wind can cause PIR sensors to detect their own movement. Magnetic probes rarely false-alarm but can trigger from nearby metal objects like parked cars or riding mowers if placed too close to parking areas.
Intermittent signal loss: Wireless transmission issues stem from interference or range limitations. Verify the receiver isn’t plugged into an outlet near large appliances, WiFi routers, or metal electrical panels that block radio signals. Move the receiver to a different outlet and retest. If the sensor sits near the maximum transmission range, consider adding a signal repeater (available for most expandable systems, around $50) or upgrading to a WiFi-based system that uses home network infrastructure. Extreme cold affects battery performance, lithium batteries maintain voltage better than alkaline in temperatures below 20°F.
Receiver not chiming: Confirm the receiver has power (check indicator lights) and volume isn’t set to minimum. Most receivers include mute functions that owners accidentally activate, consult the manual for reset procedures. Verify the sensor and receiver are paired (synchronized): power cycling both units often re-establishes connection. If using multiple receivers, confirm each is programmed to the sensor’s unique transmission code.
Short battery life: Traffic volume directly impacts battery consumption, sensors in high-traffic areas trigger frequently, draining power faster. Expect 6-month battery life with moderate use (10-20 triggers daily): heavy use shortens this to 3-4 months. Cold weather accelerates drain: switching to lithium batteries extends winter performance. For sensors requiring frequent battery changes, upgrading to solar-powered or wired systems eliminates the issue permanently.
If problems persist after troubleshooting, contact the manufacturer, many offer technical support and warranty coverage for defective units. Keep installation photos and notes documenting sensor placement and settings: this information helps support staff diagnose issues remotely.