


Table of Contents
ToggleMost homeowners don’t think about their alarm system battery until the beeping starts at 2 a.m. That backup battery is the difference between continuous protection and a dead system when the power goes out. Whether you’re dealing with a wired system tied to your electrical panel or a wireless setup, every alarm relies on battery power at some point, and understanding how these batteries work can save you from false alarms, service calls, and security gaps during outages.
Key Takeaways
- An alarm system battery is critical backup power that keeps your home protected during outages when break-ins are most likely, making it essential for both security and insurance compliance.
- Sealed lead-acid batteries last 3–5 years, lithium batteries last 3–7 years, and proper temperature control (50–77°F) significantly extends all alarm system battery lifespan.
- Low-battery beeping, delayed system responses, and false alarms are key warning signs your alarm battery needs replacement within 24–72 hours.
- Replacing an alarm system battery yourself takes 20 minutes with basic tools: disconnect AC power, note wire colors (red for positive, black for negative), and notify your monitoring station before starting.
- Proactive maintenance—including quarterly backup power tests, annual terminal inspections, and replacement every 3–4 years—prevents security gaps and eliminates costly service calls.
Why Your Alarm System Battery Matters
The backup battery in your alarm system isn’t just an accessory, it’s a critical component that keeps your home protected during power failures. When electrical service cuts out due to storms, outages, or tripped breakers, your alarm switches seamlessly to battery power.
Without a functioning backup battery, your alarm becomes useless the moment you lose power. That’s exactly when break-ins are more likely, criminals know outages create opportunity. A depleted or missing battery leaves your home vulnerable.
Beyond power outages, the battery maintains system memory and settings. Panel configurations, zone programming, and user codes all depend on continuous power. Some systems also use battery power to transmit alerts to monitoring stations even when phone or internet lines are cut.
Most municipal codes and insurance policies for home security require functional backup power. If you’re monitored by a professional service, they’ll likely contact you when battery voltage drops below acceptable thresholds. Ignoring those warnings can void your monitoring agreement.
Types of Alarm System Batteries Explained
Alarm system batteries come in three main chemistries, each with distinct characteristics:
Sealed lead-acid (SLA) batteries are the workhorse of wired alarm panels. These rechargeable batteries typically deliver 12V DC and range from 4Ah to 18Ah capacity depending on your system’s power draw. They’re housed in your control panel cabinet and are recharged continuously by the transformer when AC power is available. SLA batteries are affordable, usually $15 to $35, but they’re heavy and have the shortest lifespan of the three types.
Lithium batteries are increasingly common in modern wireless systems and sensors. They’re lighter, last longer, and perform better in temperature extremes than SLA batteries. Many motion sensor alarm devices and door contacts now use CR123A or AA lithium cells. Expect to pay $8 to $20 per battery, but you’ll replace them far less often.
Nickel-metal hydride (NiMH) batteries occupy the middle ground. They’re rechargeable like SLA but lighter and more environmentally friendly. Some newer panels use NiMH packs in the 7.2V to 9.6V range. They cost $25 to $50 and offer moderate lifespan.
Your alarm panel will specify the exact battery type and voltage required, never substitute a different chemistry or voltage. Check your system manual or the label inside the panel cabinet. Using the wrong battery can damage electronics or create fire hazards.
How Long Do Alarm System Batteries Last?
Battery lifespan varies significantly based on type, usage, and environment.
Sealed lead-acid batteries in control panels typically last 3 to 5 years. Heavy power draws, like systems with multiple wireless devices, keypads, or sirens, shorten that window. If your system frequently runs on battery due to unreliable power, expect replacement closer to the 3-year mark.
Lithium batteries in wireless sensors often last 3 to 7 years depending on activity level. A door sensor that triggers ten times daily will deplete faster than a rarely-used window sensor. Motion detectors with built-in cameras drain batteries much faster than passive infrared-only models.
Temperature extremes are battery killers. SLA batteries perform best between 50°F and 77°F. Installing your panel in an uninsulated garage or attic can cut lifespan in half. Lithium cells tolerate cold better but still degrade faster above 86°F.
Deep discharge cycles accelerate aging. If your battery routinely drains below 50% capacity during outages, it won’t reach its rated lifespan. Systems that experience frequent or extended power loss should use higher-capacity batteries.
Many panels now include battery health monitoring that tracks charge cycles and estimates remaining life. Quality monitoring services offered by comprehensive security system providers often include proactive battery replacement reminders. Don’t wait for the low-battery chirp, mark your calendar and replace batteries proactively every 3 to 4 years for SLA types.
Signs Your Alarm System Battery Needs Replacement
Your system will usually tell you when the battery is failing, but not always with enough warning.
Low-battery beeping is the most obvious sign. Most panels emit a single chirp every 30 to 60 seconds when battery voltage drops. The keypad may also display “LOW BAT” or a battery icon. Don’t ignore this, you typically have 24 to 72 hours of reserve power remaining.
Delayed system responses indicate voltage sag. If your keypad takes longer to arm or disarm, or sensors seem sluggish, the battery may not be delivering adequate current. This is common with aging SLA batteries that develop high internal resistance.
False alarms or trouble codes can stem from power issues. When battery voltage fluctuates, sensors may send erratic signals. Check your event log for “AC LOSS” or “COMM FAILURE” messages, these often correlate with battery problems in wired alarm systems.
Physical signs matter too. Remove the battery and inspect it. Look for bulging sides, corroded terminals, or leaked electrolyte (white crystalline deposits on SLA batteries). Any of these warrant immediate replacement. Swollen lithium cells are a fire hazard, handle carefully and dispose at a battery recycling center.
Age alone is sufficient reason. Even if your system isn’t complaining, replace SLA batteries every 4 years maximum. Write the installation date on the battery with a permanent marker when you install it.
How to Replace Your Alarm System Battery (DIY Guide)
Replacing a control panel battery is straightforward, but you’ll need to follow proper procedure to avoid triggering false alarms or damaging equipment.
Tools and materials:
- Replacement battery (match voltage and Ah rating exactly)
- Phillips screwdriver
- Needle-nose pliers (for stubborn wire terminals)
- Voltmeter (optional but recommended)
- Safety glasses
Step-by-step process:
-
Notify your monitoring station if you have professional monitoring. Let them know you’re performing maintenance to avoid dispatch. Most companies provide a passphrase to place your account on test.
-
Disarm the system and disconnect AC power. Unplug the transformer from the wall outlet or switch off the dedicated breaker. Never work on the panel with AC power connected.
-
Open the panel cabinet. Most use a single screw at the bottom or a hinged door. You don’t need to remove the panel from the wall.
-
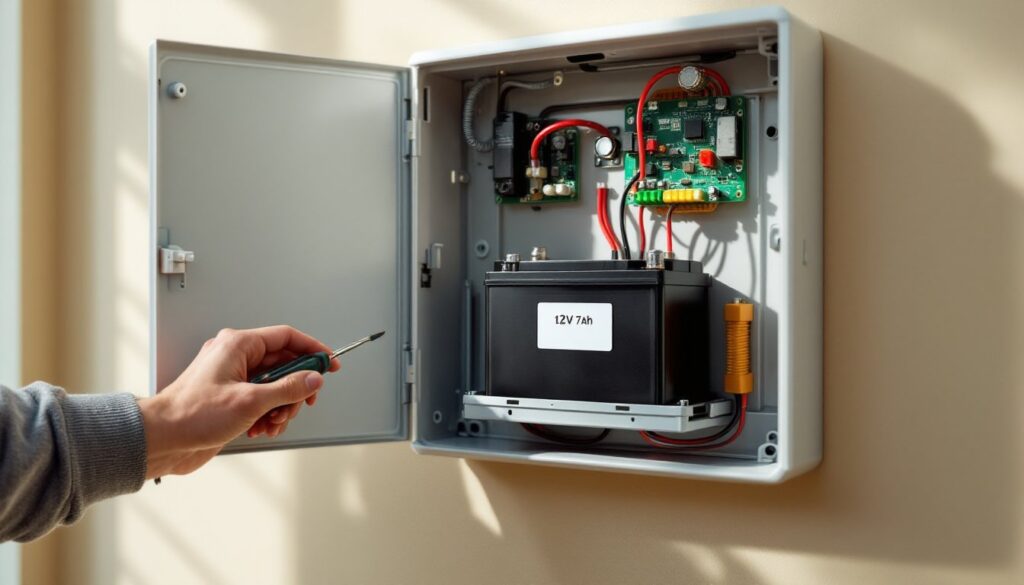
Locate the battery. It’s typically mounted in the lower section of the cabinet on a metal bracket or foam pad. For Ring home alarm or similar wireless base stations, the battery may be in a compartment accessible from the back.
-
Disconnect the old battery. Note the wire colors, red connects to positive (+), black to negative (-). Remove connectors by pulling straight off the terminals. If they’re stuck, gently wiggle with pliers. Don’t yank the wires.
-
Remove the battery from its mounting. It may be held by a strap, clip, or simple friction fit.
-
Install the new battery in the same position. Connect red to positive first, then black to negative. Ensure connectors are fully seated, loose connections cause intermittent power loss.
-
Restore AC power by plugging in the transformer or flipping the breaker. The panel should boot up and display normal status. Some systems require you to clear the low-battery trouble code by entering your master code.
-
Test the system. Arm and disarm several times. Trigger a sensor to confirm proper operation. If you have a backup dialer or cellular module, verify it’s communicating.
-
Notify your monitoring station that maintenance is complete and take your account off test.
Safety notes: Wear safety glasses when handling SLA batteries, they contain sulfuric acid. If you spill electrolyte, neutralize with baking soda and water. Dispose of old batteries at a recycling center or auto parts store, never put them in household trash. If you’re uncomfortable working with low-voltage wiring, call a licensed alarm technician.
Maintaining Your Alarm System Battery for Longevity
Proper maintenance extends battery life and prevents unexpected failures.
Keep the panel cool and dry. Install control panels in climate-controlled spaces when possible. Avoid garages, attics, or exterior walls that experience temperature swings. If your panel is already in a hot location, consider adding ventilation or relocating it.
Test backup power quarterly. Unplug the transformer and let the system run on battery for 30 minutes. It should operate normally without voltage warnings. This confirms the battery holds a charge and the panel’s charging circuit is functioning. Professional monitoring services with advanced security platforms often automate this testing.
Check terminal connections annually. Loose or corroded terminals prevent proper charging. Remove connectors and clean terminals with a wire brush or sandpaper if you see corrosion. Apply a thin coat of dielectric grease to prevent future oxidation.
Update firmware regularly. Manufacturers release updates that improve battery management algorithms. Many Google Home alarm and similar smart systems push updates automatically, but older panels may require manual updates via USB or technician visit.
Reduce unnecessary power draw. Dim keypad backlights, disable unused zones, and replace power-hungry wireless devices with wired equivalents where practical. Every milliamp you save extends battery runtime during outages.
Monitor system events. Most panels log AC power loss events. If you’re experiencing frequent outages, investigate the cause, it may be a loose transformer connection, failing power supply, or electrical issue requiring an electrician. Frequent cycling shortens battery life.
Keep a spare battery on hand. SLA batteries have a shelf life of 6 to 12 months when stored properly. If you live in an area prone to extended outages or have a monitored system where downtime isn’t acceptable, stock a replacement. Store it in a cool, dry location and charge it every 6 months to prevent sulfation.
For reliable home alarm batteries that maintain charge through extended outages, proper sizing matters. If your current battery doesn’t last through typical power loss events in your area, consider upgrading to a higher Ah rating. Check your panel manual for maximum supported capacity.
Conclusion
Your alarm system battery is the silent guardian that keeps your home protected when everything else fails. Regular replacement every 3 to 4 years, proper maintenance, and attention to warning signs ensure your system stays reliable. This is basic preventive work that saves you from service calls and security gaps, and it’s well within reach of any homeowner with a screwdriver and 20 minutes.