


Table of Contents
ToggleGoogle’s ecosystem has expanded far beyond voice commands and music playback. Today, homeowners can build a complete security setup using Google-compatible devices, creating a network that monitors doors, windows, cameras, and more, all controlled through voice or smartphone. Unlike traditional hardwired alarm systems that require professional installation and monthly monitoring contracts, a Google Home security system offers flexibility. You can start small with a single camera and expand as needed, integrating everything through the Google Home app and Google Assistant. This guide walks through what you need to know before investing in this smart protection approach.
Key Takeaways
- A Google Home security system is a modular, contract-free alternative that lets you start small with compatible devices like cameras, doorbells, and smart locks, then expand as needed through the Google Home app.
- Core hardware options include Nest cameras and doorbells, third-party contact sensors, smart locks from Yale or August, and a Nest Hub display to serve as your visual control center—no professional installation required.
- Voice commands and automated routines enable hands-on control, allowing you to lock doors, view camera feeds, and trigger multi-device actions like ‘Goodnight’ routines without monthly monitoring contracts.
- Expect to invest $700–$1,000 for a starter setup, plus optional Nest Aware subscriptions ($8–$15/month) for extended video history and advanced alerts, giving you flexibility to cancel anytime.
- Google Home security systems depend on stable Wi-Fi, require self-monitoring unless you add a third-party service, and work best when paired with privacy settings enabled and two-factor authentication on your Google account.
- This approach is ideal for renters and DIY homeowners who value portability and control over traditional hardwired systems, but it may not suit those needing professional 24/7 monitoring.
What Is the Google Home Security System?
Google doesn’t manufacture a standalone, branded security system like ADT or SimpliSafe. Instead, it offers an ecosystem approach, a platform where compatible third-party devices (cameras, doorbells, sensors, locks) connect through the Google Home app and respond to Google Assistant commands.
Think of it as a DIY security framework. You choose hardware from brands like Nest (Google’s own), Arlo, TP-Link, Yale, and others that carry the “Works with Google” badge. These devices communicate via Wi-Fi or Thread (a low-power mesh protocol), and you control them from one interface.
This differs from traditional systems in a few key ways:
- No central hub required (in most cases). Your Google Nest Hub or smartphone serves as the command center.
- No professional monitoring by default. You monitor alerts yourself unless you subscribe to a third-party service.
- Modular installation. Add one camera this month, a smart lock next month. No need to wire everything at once.
For renters or homeowners who want control without contracts, this setup is appealing. But it does require stable Wi-Fi and some comfort with app-based troubleshooting.
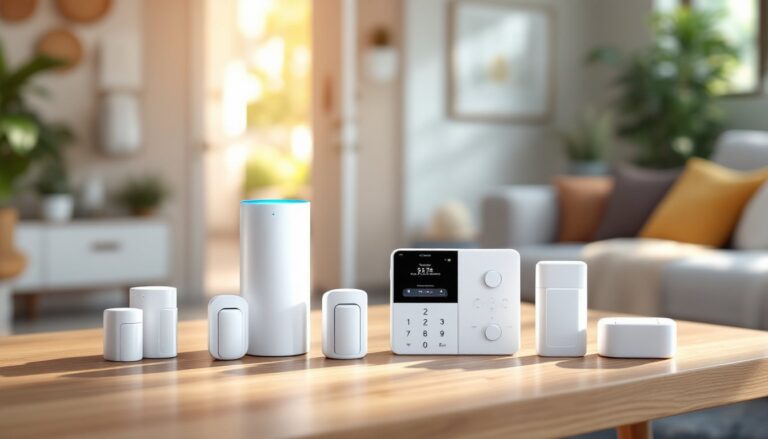
Key Components and Hardware Options
Building a functional Google-compatible security system means selecting from several device categories. Here’s what’s available and how they fit together.
Cameras and Doorbells
Nest Cam (Indoor/Outdoor, Battery or Wired): Google’s own line. The battery version installs anywhere without drilling for power, while the wired model offers 24/7 recording. Both deliver 1080p video, night vision, and person/package/vehicle detection.
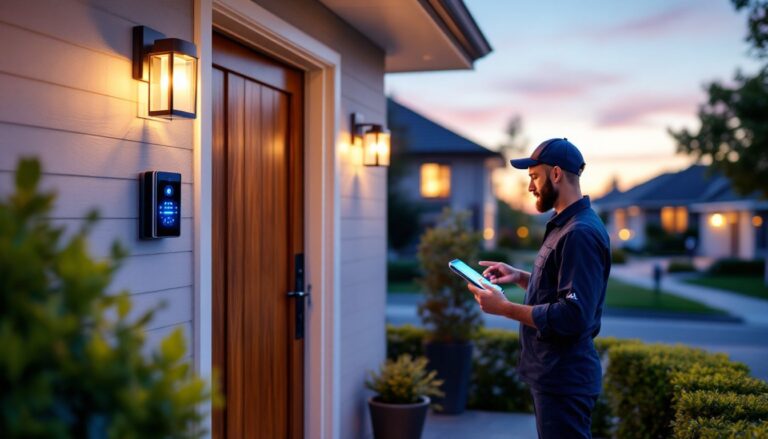
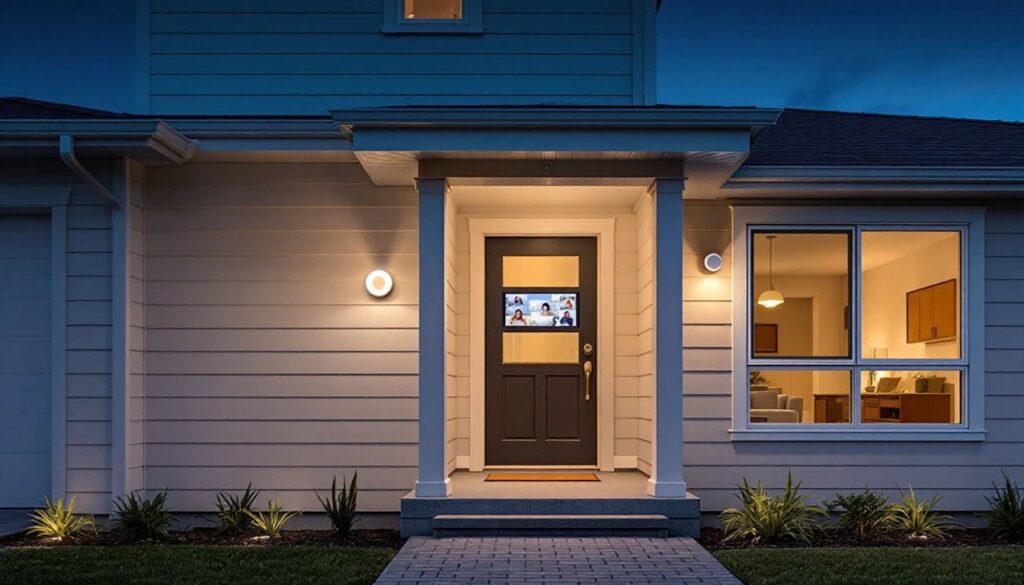
Nest Doorbell: Replaces your existing doorbell button. Connects to your existing chime wiring (16-24V AC transformer required) or runs on battery. Video quality is solid, and two-way talk lets you communicate with visitors. If you’re comparing with other video doorbells, the Ring Home Alarm ecosystem works similarly but uses Alexa instead of Google Assistant.
Third-party options: Arlo, Wyze, and Logitech offer cameras that integrate via Google Home. Check compatibility before buying, not every feature works across brands.
Door and Window Sensors
Google doesn’t make dedicated contact sensors, so you’ll rely on third-party options like ADT sensors (if you use ADT’s self-monitoring plan) or devices from companies like Samsung SmartThings that sync with Google Home. These sensors alert you when doors or windows open, which is critical for perimeter monitoring. Some homeowners also add motion sensor alarms for interior detection in hallways or basements.
Smart Locks
Brands like Yale, August, and Schlage offer deadbolts and lever locks that work with Google Assistant. You can lock/unlock via voice command or app, set temporary access codes for contractors, and get notifications when someone enters.
Installation note: Most smart locks fit standard door prep (2-1/8″ bore hole, 1″ latch bore). If your door has a non-standard backset (distance from door edge to center of bore), you may need an adapter plate.
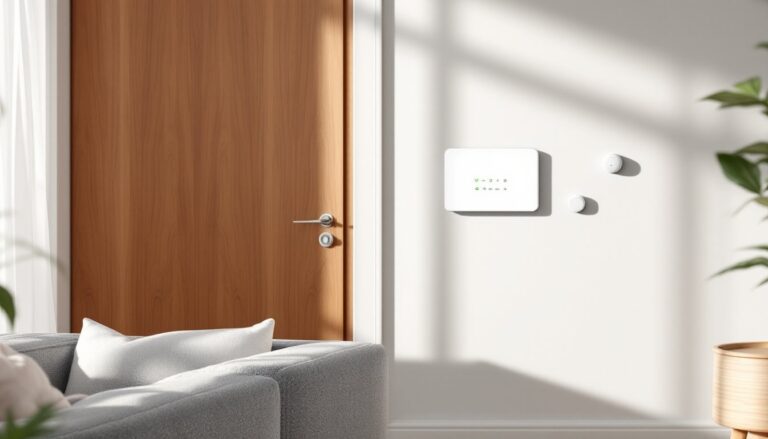
Smart Displays and Hubs
A Google Nest Hub Max or Nest Hub (2nd gen) acts as a visual control panel. You can view camera feeds, arm/disarm routines, and check sensor status by voice. The Max includes a built-in camera for video calls and room monitoring.
If you already own a Google Home speaker (Mini, standard, or Max), it can trigger alerts and control devices, but you won’t get video feeds without a display.
Setting Up Your Google Home Security System
Installation varies by device, but the general workflow is consistent. Here’s a step-by-step breakdown.
1. Plan Your Coverage
Walk your property and identify entry points (front/back doors, garage door, ground-floor windows) and high-value areas (home office, master bedroom). Prioritize cameras at entry points and sensors on doors you use less often (basement, side entrance).
2. Install Cameras and Doorbells
For battery-powered Nest Cams: Use the included magnetic mount or screw-in bracket. Place cameras 7-8 feet high for optimal field of view. Avoid aiming directly at windows (glare and reflections interfere with motion detection).
For wired Nest Doorbells: Turn off power at the breaker before removing your old doorbell. Connect the Nest wires to your existing low-voltage wires (typically 16-24V AC). If your chime is mechanical (a traditional ding-dong unit), you may need to bypass it or install the included chime connector to prevent buzzing.
3. Add Sensors and Locks
Most contact sensors are adhesive-mount. Clean the door frame with isopropyl alcohol before sticking them down. The sensor and magnet should align within 1/2 inch when the door is closed.
Smart locks replace your existing deadbolt. Remove the interior thumb turn and exterior key cylinder, then follow the lock’s template for screw holes. Some models require a Phillips screwdriver and an adjustable wrench: no special tools needed.
4. Connect Everything in the Google Home App
Open the app, tap + (Add), then Set up device > Works with Google. Search for your device brand, log in to that brand’s account, and authorize Google Home access. Each device will appear as a tile in your app.
Create Routines to automate actions. For example: “When the front door unlocks after sunset, turn on the porch light and hallway camera.”
Troubleshooting tip: If a device won’t connect, confirm it’s on the same 2.4 GHz Wi-Fi network (many smart home devices don’t support 5 GHz). Restart your router if needed.
Integration with Google Assistant and Smart Home Devices
The real power of a Google-based system is voice control and automation across your entire smart home.
Voice Commands
You can say:
- “Hey Google, show me the front door camera” (displays live feed on Nest Hub or TV with Chromecast)
- “Lock the back door” (engages smart lock)
- “Arm the house” (activates a custom Routine that locks doors, arms cameras, and turns off lights)
For safety, Google requires a voice match PIN for unlock commands. Set this up in the Google Home app under Settings > Voice Match.
Routines and Automation
Routines link triggers (time, location, or device status) to actions. Examples:
- “Goodnight”: Locks all doors, sets cameras to high sensitivity, turns off indoor lights.
- “I’m leaving”: Arms cameras, adjusts thermostat to Eco mode, plays a reminder to close the garage.
You can also integrate non-security devices. If someone rings the Nest Doorbell, you can trigger smart lights to blink or pause music playback.
Compatibility with Other Ecosystems
If you’re comparing platforms, systems like Xfinity Home Alarm or Honeywell Home Alarm offer professional monitoring and work with multiple assistants (Alexa, Google, sometimes Apple HomeKit). Google’s approach is more flexible but requires more hands-on management.
Costs, Subscriptions, and Value Comparison
Upfront hardware costs vary widely based on what you buy.
Sample starter setup (rough 2026 pricing):
- Nest Doorbell (battery): $180
- Nest Cam (outdoor, battery): $180
- Yale Assure Lock 2 (keypad + Wi-Fi): $280
- Google Nest Hub (2nd gen): $100
Total: ~$740
You can start smaller, one camera and a smart lock, and expand later. Compare this to a professionally installed system like AT&T Home Alarm or Brinks Home Alarm, which may bundle equipment but lock you into monitoring contracts ($25-$60/month).
Subscription Options
Nest Aware (optional but recommended for cameras):
- Nest Aware: $8/month or $80/year. Includes 30 days of event video history, person/package/vehicle alerts, and activity zones.
- Nest Aware Plus: $15/month or $150/year. Adds 60 days of history and 10 days of 24/7 recording (for wired cameras only).
Without a subscription, you get 3 hours of event history and basic motion alerts, functional, but limited.
According to recent smart home research from Digital Trends, homeowners increasingly prefer pay-as-you-go models over traditional contracts, especially when hardware is reusable if they move.
Long-Term Value
No long-term contract means you can cancel Nest Aware anytime. Your hardware still works: you just lose cloud storage. For budget-conscious DIYers, this beats being locked into a 3-year monitoring agreement.
Pros and Cons for Homeowners
Advantages
- Flexibility: Add devices over time without calling an installer or rewiring.
- No contracts: Pay for hardware once: subscriptions are optional.
- Voice control: Integrate with lights, thermostats, and locks for whole-home automation.
- Renters welcome: Battery-powered cameras and adhesive sensors don’t require drilling or permanent changes.
- Portability: Take devices with you when you move (unlike hardwired systems).
Drawbacks
- No professional monitoring by default: You’re responsible for watching alerts. Third-party services like Noonlight offer add-on monitoring, but it’s not built-in.
- Wi-Fi dependency: If your internet goes down, remote access and cloud recording stop. Battery backup on your router helps but isn’t foolproof.
- Privacy considerations: Google devices process voice commands in the cloud. Review privacy settings in the Google Home app and disable mic/camera when not needed. Security experts at Tom’s Guide recommend enabling two-factor authentication on your Google account and regularly reviewing connected devices.
- Mixed compatibility: Not every “Works with Google” device supports all features. Check integration details before buying.
Safety Note
Always wear safety glasses when drilling into door frames or exterior walls for mounts. Use a stud finder to avoid hitting electrical wiring or plumbing. If you’re installing devices near service panels or in areas with complex wiring, consult a licensed electrician. Some jurisdictions require permits for hardwired doorbell installations that modify low-voltage circuits, check local code.
For homeowners concerned about false alarms, testing by Good Housekeeping has shown that person detection accuracy improves significantly when cameras are positioned with clear sightlines and activity zones are properly configured in the app.
Conclusion
A Google Home security system won’t replace a professionally monitored alarm for every homeowner, but it offers a smart, scalable alternative for those who want control without contracts. Start with one or two devices, test the workflow, and expand as your budget and comfort level grow. The key is matching hardware to your actual entry points and integrating routines that fit your daily habits, not just piling on gadgets because they’re “smart.”