


Table of Contents
ToggleA flooded basement can destroy thousands of dollars in property within hours, and most homeowners don’t realize there’s a problem until they step into standing water. Sewer backups rank among the most expensive and unpleasant home disasters, often striking without warning when municipal lines overflow, septic systems fail, or sump pumps quit. A sewer backup alarm system detects rising water levels in floor drains, ejector pits, or sump basins before damage occurs, giving homeowners time to act. These devices cost a fraction of what one cleanup bill runs and install easily in most homes. For anyone with a basement, crawlspace, or septic system, this is cheap insurance worth considering.
Key Takeaways
- A sewer backup alarm system detects rising water levels early, giving homeowners critical time to prevent thousands of dollars in damage before sewage enters living spaces.
- Backup alarms cost between $50 and $300 depending on features, making them affordable insurance compared to average cleanup costs of $3,000 to $10,000 and insurance exclusions.
- Choose between battery-powered (easiest DIY), hardwired with battery backup (most reliable), or smart Wi-Fi-enabled alarms (best for remote monitoring and home automation integration).
- Most homeowners can install a sewer backup alarm system in 30 to 60 minutes using basic tools, though electrical work near water requires GFCI protection and may need professional help.
- Test your alarm monthly and position the sensor probe 4 to 8 inches below the overflow point to ensure it triggers before water reaches basements or finished spaces.
- Homes with basements, below-grade living spaces, septic systems, or frequent absences benefit most from backup alarms, especially models with remote alerts and integration with security systems.
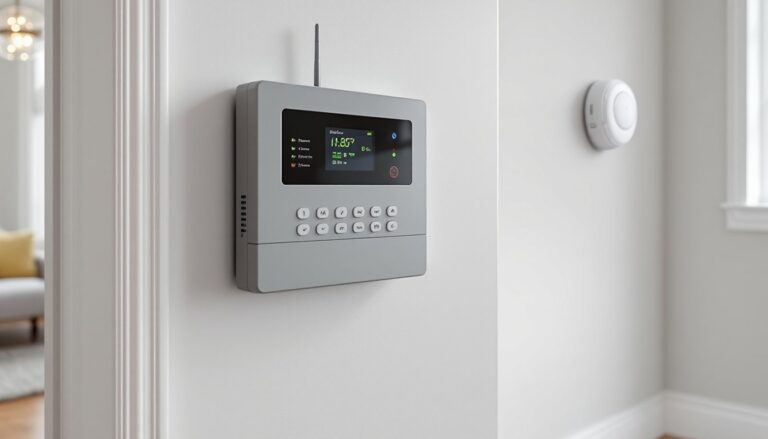
What Is a Sewer Backup Alarm System and How Does It Work?
A sewer backup alarm is a water-sensing device that monitors specific areas where sewage or wastewater could enter a home. It’s essentially an early warning system, not a prevention tool, think smoke detector, not sprinkler.
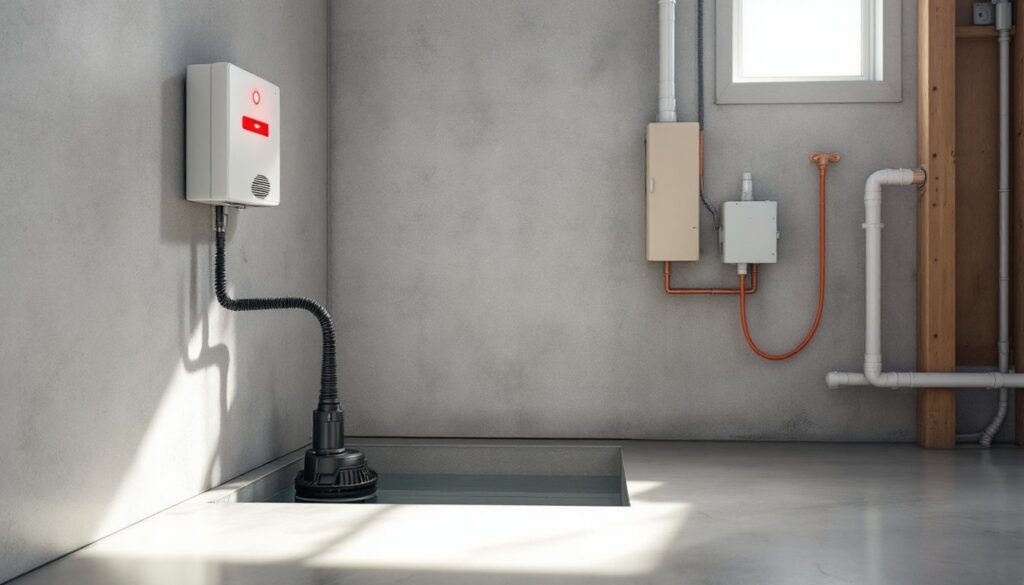
Most systems use a float switch or water sensor probe positioned at a critical level inside a sump pit, sewage ejector basin, septic tank alarm chamber, or near a floor drain. When water rises to the sensor’s trigger point, typically 6 to 12 inches below the rim or overflow point, the alarm activates. Some models emit a loud audible alarm (85–120 decibels), while others send alerts via Wi-Fi to a smartphone app or home automation hub.
Unlike traditional home alarm systems, which monitor intrusion or fire, these devices focus solely on water intrusion from below. They’re usually installed in the same locations you’d find sump pumps or sewage ejector pumps, basement utility rooms, crawlspaces, or septic system components.
The technology is straightforward: a probe detects conductivity when submerged in water, closing a circuit that triggers the alarm. Higher-end models add features like battery backup, remote connectivity, and integration with smart home systems. According to experts at HomeAdvisor, installing a backup alarm can reduce average water damage claims by catching problems before they escalate.
Key point: these alarms don’t stop the backup. They buy you time to shut off water sources, call a plumber, or activate emergency pumps before sewage reaches finished living spaces.
Why Every Homeowner Should Consider Installing a Sewer Backup Alarm
The average sewer backup cleanup costs between $3,000 and $10,000, and most homeowners insurance policies exclude sewer backup damage unless you’ve purchased a specific rider. Even with coverage, deductibles and rate increases make prevention the smarter play.
Basements flood faster than you think. A failed sump pump during heavy rain can fill a basement with several inches of water in under an hour. Sewage ejector pump failures happen without warning, often when the float switch sticks or the impeller clogs. By the time you smell trouble upstairs, the damage is done.
Homeowners with septic systems face additional risk. When the drain field saturates or the tank fills beyond capacity, sewage backs up into the lowest plumbing fixtures, usually basement drains or toilets. A properly placed alarm in the septic tank’s pump chamber detects this condition early, as detailed in guidance from Angi’s septic alarm troubleshooting guide.
Permit and code considerations: most jurisdictions don’t require backup alarms in single-family homes, but the International Residential Code (IRC) does mandate them in certain commercial applications. Some municipalities require them when installing new sewage ejector systems. Check with your local building department.
Practical benefits go beyond damage prevention. If you travel frequently, rent out a basement apartment, or have finished living space below grade, an alarm with remote monitoring provides peace of mind. You’ll know about a failure before tenants call or mold takes hold.
Bottom line: for $50 to $300, you’re buying early warning that can save tens of thousands. That’s better ROI than most home upgrades deliver.
Types of Sewer Backup Alarm Systems for Residential Use
Not all backup alarms are created equal. Your choice depends on power availability, monitoring needs, and how much you’re willing to spend.
Battery-Powered vs. Hardwired Systems
Battery-powered alarms are the easiest DIY option. They typically run on 9V or AA batteries and mount anywhere using adhesive or screws. The sensor probe dangles into the pit or sits on the floor. Expect to replace batteries annually, or sooner if the unit doesn’t have a low-battery warning. These units cost $50 to $150 and work well for seasonal homes or supplementary monitoring.
Downside: if the battery dies, you’re blind. And a loud alarm in a remote basement doesn’t help if nobody’s home.
Hardwired alarms connect to 120V AC power, usually via a standard outlet or direct wiring into a junction box. Many include battery backup to function during power outages, a critical feature, since sump pump failures often coincide with storms that knock out electricity. These systems range from $100 to $250 and offer more reliable long-term operation.
Some hardwired models integrate with existing home security panels. If you already have a wired alarm system installed, adding a water sensor zone is often straightforward.
Pro tip: choose a model with both AC power and battery backup. The redundancy matters when you need it most.
Smart Alarms with App Connectivity
Wi-Fi-enabled alarms are the newest category, and they solve the “nobody’s home” problem. These devices connect to your home network and send push notifications, emails, or text alerts when water is detected. Prices run $150 to $300.
Leading models integrate with Alexa, Google Home, or HomeKit, allowing voice alerts and automation routines. For example, you could program the system to trigger smart plugs that turn off water heaters or washing machines when a backup is detected.
Some systems offer multiple sensor inputs, so one base station monitors several locations, sump pit, sewage ejector, floor drain, and water heater pan. This scalability makes sense in larger homes or properties with multiple risk points.
Trade-off: smart alarms depend on Wi-Fi and internet connectivity. If your router goes down during a storm, notifications won’t reach your phone (though the local alarm will still sound). Look for models with cellular backup or local alarm functionality as a fail-safe.
For serious DIYers, expert reviews from Bob Vila often highlight which smart models offer the best combination of reliability and features.
How to Choose the Right Sewer Backup Alarm for Your Home
Start by identifying where you need monitoring. Walk your basement or crawlspace and locate:
- Sump pump pits: Most common installation point
- Sewage ejector basins: If you have below-grade bathrooms, laundry, or kitchen
- Floor drains: Especially those connected to municipal sewer lines
- Septic pump chambers: For homes on septic systems
Measure the depth of each pit or basin. You’ll need a sensor probe long enough to reach the trigger depth, usually set 4 to 8 inches below the overflow point. Standard probe lengths are 6, 12, 18, and 24 inches.
Key features to compare:
- Alarm volume: 85 dB minimum: 100+ dB preferred for large basements
- Power source: Battery, hardwired, or dual with backup
- Remote alerts: Essential if you travel or have rental units
- Sensor type: Float switch (mechanical) or probe (electronic)
- Environmental rating: Look for units rated for damp or wet locations
- Ease of testing: A test button lets you verify function monthly
Float switches are durable and simple but can stick due to debris or soap buildup. Probe sensors are more reliable in dirty water but require occasional cleaning.
For homes with comprehensive security setups, consider alarms that integrate with existing monitoring services. Some security companies offer water sensor add-ons with professional monitoring, when the alarm triggers, the monitoring center calls you and dispatches help if needed.
Budget considerations: a basic battery unit costs $50–$75. A hardwired model with battery backup runs $100–$150. Smart alarms with app connectivity start around $150 and top out near $300 for multi-sensor systems. Installation labor (if you hire out) adds $100–$200 per unit, though most DIYers can handle this job in under an hour.
DIY Installation Guide: Setting Up Your Sewer Backup Alarm System
Most sewer backup alarms install in 30 to 60 minutes with basic tools. Here’s the process:
Tools and materials needed:
- Sewer backup alarm unit (with probe or float)
- Drill with appropriate bits (for mounting screws)
- Screwdriver (Phillips or flat, depending on unit)
- Measuring tape
- Level (optional, but helpful)
- Wire strippers (if hardwiring)
- GFCI outlet tester (for hardwired units)
- Safety gear: work gloves, safety glasses
Step-by-step installation:
-
Shut off power if installing a hardwired unit near electrical components. Test outlets with a GFCI tester to confirm they’re off.
-
Choose the mounting location. The alarm body mounts on a nearby wall, joist, or shelf, high enough to avoid water contact but close enough for the probe to reach the pit. Most units need to stay within 6 feet of the sensor location due to wire length.
-
Mark and drill mounting holes. Use the alarm’s mounting bracket as a template. For concrete walls, use a masonry bit and plastic anchors. For wood studs or joists, standard wood screws (usually #8 × 1.5 inch) work fine.
-
Install the probe or float sensor. Thread the sensor wire through the cable gland or port on the alarm body. Lower the probe into the pit or basin, positioning it so the tip sits at your desired trigger level, typically where 2 to 4 inches of additional water rise would cause overflow. Secure the probe wire with the provided clip or zip tie to prevent it from drifting.
-
Connect power. Battery units: install fresh batteries and test. Hardwired units: either plug into a nearby GFCI outlet or connect to a junction box using 14-gauge wire and wire nuts. Follow manufacturer wiring diagrams, typically black (hot), white (neutral), and green or bare copper (ground). If you’re uncomfortable with electrical connections, hire a licensed electrician. Electrical work in damp locations must meet NEC Article 210 requirements for GFCI protection.
-
Configure smart features (if applicable). Download the manufacturer’s app, connect the alarm to your Wi-Fi network following the setup wizard, and add notification contacts. Test notifications by triggering the alarm manually.
-
Test the alarm. Most units have a test button that simulates water detection. Press it and confirm the audible alarm sounds and (for smart models) notifications arrive on your phone. For a real-world test, slowly pour water into the pit until the sensor activates, then stop. This verifies proper probe depth and sensitivity.
-
Label the alarm and power source. Use a label maker or permanent marker to note what the alarm monitors (“Sump Pit Alarm” or “Ejector Basin”) and where the power source is located. This helps future you, or emergency responders, react quickly.
Common mistakes to avoid:
- Setting the probe too low: If it only triggers when water is already overflowing, the alarm is useless.
- Forgetting battery backup: AC-powered alarms without battery backup fail during power outages, exactly when you need them most.
- Skipping monthly tests: Sensors can fail or get coated with mineral deposits. Test monthly and clean probes quarterly.
- Installing in an area with high humidity condensation: Some sensitive probes trigger false alarms from condensation. Position them away from HVAC vents or use a model designed for high-moisture environments.
When to call a pro: If your sump or ejector pit lacks a nearby outlet, you’ll need an electrician to install one (must be GFCI-protected). If you’re adding the alarm as part of a new sewage ejector pump installation, hire a licensed plumber, that work typically requires permits and inspection.
Once installed, add a reminder to your calendar to test the alarm monthly and replace batteries annually. For systems tied into broader DIY wired alarm infrastructure, ensure your control panel is programmed to recognize the new zone and trigger appropriate alerts.