


Table of Contents
ToggleFire safety isn’t optional, and it’s not negotiable. Every year, thousands of homes sustain fire damage that could’ve been minimized with proper early warning. If you’re upgrading your home’s protection or starting fresh, a wireless fire alarm system offers flexibility, reliability, and faster setup than traditional hardwired models, no fishing wires through finished walls, no electrician on retainer. This guide walks through everything homeowners need to know about wireless fire detection: how these systems work, what components you’ll actually need, and how to install and maintain one yourself.
Key Takeaways
- A wireless fire alarm system uses radio frequency signals to connect detectors without physical wiring, offering faster installation and greater flexibility than traditional hardwired models.
- Wireless systems require minimal maintenance beyond annual battery checks and monthly testing, making them ideal for homeowners seeking DIY-friendly fire protection.
- Proper placement following NFPA 72 standards—with detectors in bedrooms, hallways, and on every level—ensures early detection regardless of where a fire starts.
- Choose UL 217 certified smoke detectors and UL 2034 carbon monoxide detectors to guarantee independent safety testing and compliance with building codes.
- Smart home integration allows you to receive detailed alerts on your smartphone, silence false alarms remotely, and enable professional monitoring for $15–50/month when away from home.
- Regular maintenance including monthly testing, twice-yearly cleaning, and annual battery replacement ensures your wireless fire alarm system remains reliable when you need it most.
What Is a Wireless Fire Alarm System and How Does It Work?
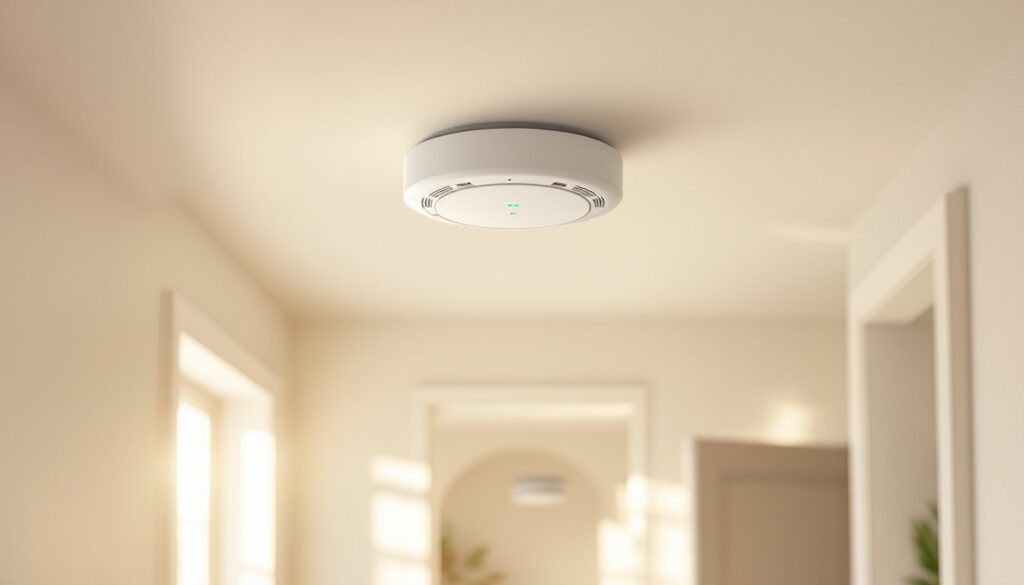
A wireless fire alarm system uses radio frequency (RF) signals to connect smoke detectors, heat sensors, and control panels without physical wiring between devices. Each sensor contains a small battery-powered transmitter that sends alerts to a central hub or control panel when smoke, heat, or carbon monoxide is detected.
Most systems operate on frequencies between 315 MHz and 915 MHz, with newer models using encrypted signals to prevent false triggers or interference. When one detector trips, it communicates with the hub, which then triggers all connected alarms throughout the home, giving occupants the earliest possible warning regardless of where the fire starts.
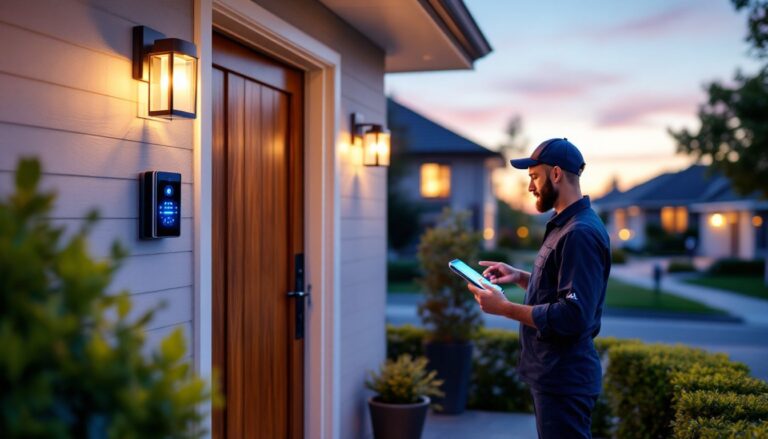
Unlike traditional hardwired setups that require 14/2 or 14/3 NM cable run through walls and ceilings, wireless systems mount directly to drywall or plaster with screws. The control panel typically plugs into a standard 120V outlet and includes a backup battery (usually 9V or rechargeable lithium) to maintain operation during power outages. Many modern systems integrate with smart home platforms, sending alerts to smartphones when you’re away.
Key Benefits of Choosing Wireless Over Wired Fire Alarms
Easier installation tops the list. You won’t need to open walls, drill through studs, or hire an electrician. Most wireless detectors mount in under five minutes per unit, just mark pilot holes, drive two screws, and snap the detector into the base plate.
Scalability matters if you’re retrofitting an older home or adding onto your property. Need coverage in a detached garage or finished attic? Add another sensor without pulling wire. Systems support anywhere from 8 to 64 devices depending on the control panel model.
Relocation flexibility is a real-world advantage. Remodeling the kitchen? Pop the detector off, reposition it, and you’re done. Try that with a hardwired system and you’re either patching drywall or leaving dead junction boxes behind.
Faster response in multi-story homes happens because interconnected alarms sound simultaneously. In a wired system, if one detector on the second floor triggers, only interconnected units on that circuit will respond unless you’ve daisy-chained them, wireless systems broadcast to all enrolled devices instantly.
Battery dependency is the trade-off. Wireless units need annual battery checks at minimum, and some sensors use coin-cell batteries that last 5-10 years, while others use standard 9V batteries replaced yearly. Factor ongoing battery costs into your budget.
Essential Components of a Wireless Fire Alarm System
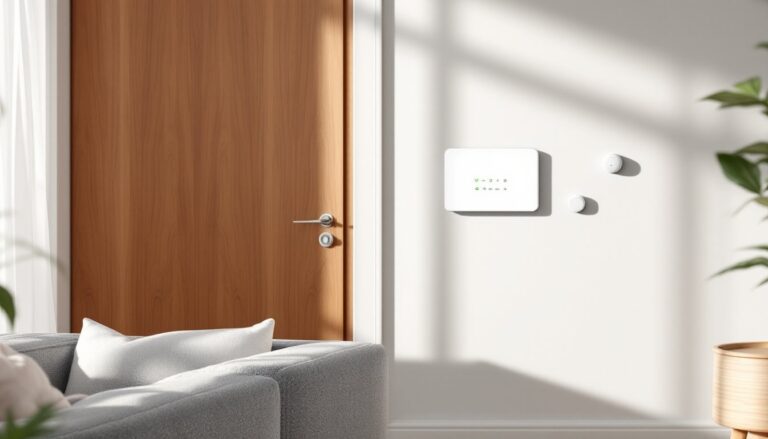
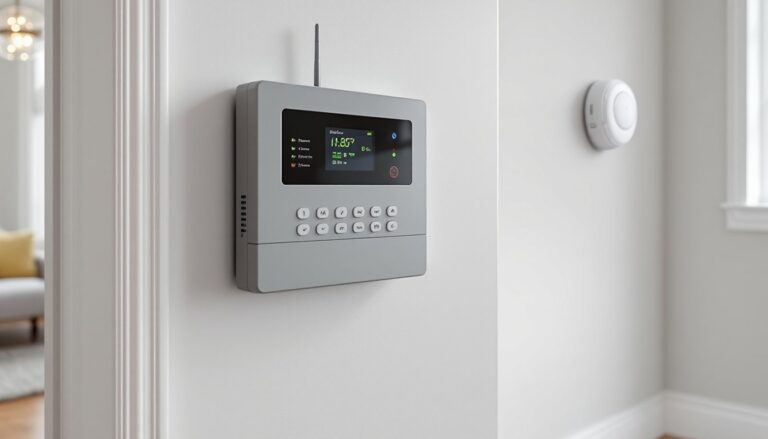
Control Panel or Hub
The brain of the system. It receives signals from all sensors, sounds the primary alarm, and, in monitored systems, contacts emergency services or sends smartphone alerts. Budget panels handle basic smoke detection: higher-end models integrate with security systems, carbon monoxide detectors, and water leak sensors.
Smoke Detectors
Two main types: ionization and photoelectric. Ionization detectors respond faster to flaming fires (paper, grease), while photoelectric models excel at detecting smoldering fires (upholstery, electrical). Dual-sensor models combine both technologies and are recommended by the National Fire Protection Association (NFPA). Install at least one detector per sleeping area, one outside each sleeping zone, and one per story including basements.
Heat Detectors
Best for garages, attics, and kitchens where smoke detectors cause false alarms. These activate when ambient temperature exceeds 135°F to 165°F or when temperature rises faster than 15°F per minute. They won’t replace smoke detectors, they’re supplemental.
Carbon Monoxide Detectors
Not optional if you have gas appliances, an attached garage, or a fireplace. Modern systems connecting with wireless security platforms include CO sensors that share the same RF network as fire alarms. Place one on each level and within 15 feet of sleeping areas.
Strobe Lights and Remote Sirens
For accessibility compliance or large properties. Strobe lights alert hearing-impaired occupants: remote sirens ensure everyone in a sprawling ranch or multi-building property hears the alarm.
How to Choose the Right Wireless Fire Alarm System for Your Home
Start by counting rooms and calculating coverage area. A typical wireless smoke detector covers up to 1,200 square feet in open floor plans, less in homes with multiple closed rooms. For a 2,500-square-foot two-story home, expect to install 6-8 detectors minimum.
Check battery life specs before buying. Systems using sealed 10-year lithium batteries save maintenance hassle. Models with replaceable 9V batteries are cheaper upfront but require annual replacements, budget around $3-5 per battery.
Look for UL 217 certification (smoke alarms) and UL 2034 (carbon monoxide detectors). These aren’t suggestions, they’re safety standards ensuring devices have been independently tested. Non-certified detectors might work, but they’re a gamble when lives are at stake.
Decide if you want monitored or unmonitored service. Monitored systems connect to a central station that dispatches fire services automatically, typically costing $15-50/month. Unmonitored systems rely on smartphone alerts and you calling 911. If you travel frequently or have elderly family members living alone, monitoring makes sense.
Smart home integration isn’t fluff, it’s practical. Systems compatible with Z-Wave, Zigbee, or proprietary hubs let you silence false alarms remotely, receive detailed alerts (which room triggered), and integrate with other safety devices. Recommended wireless detectors from leading home safety reviews consistently highlight this feature.
Range matters in larger homes. Most wireless systems have an effective range of 300-500 feet in ideal conditions (meaning no walls). Thick plaster, brick, or metal framing reduces that. Multi-story homes or properties exceeding 3,000 square feet may need RF repeaters to relay signals between distant sensors and the hub.
DIY Installation: Step-by-Step Setup Guide
Safety first: Wear safety glasses when drilling overhead. Have a stable ladder and a second person to hand you tools.
Step 1: Plan Detector Placement
Follow NFPA 72 and local building codes. Mount ceiling detectors at least 4 inches from walls: wall-mounted units should be 4-12 inches below the ceiling. Avoid placement near HVAC vents, bathrooms, or kitchens (unless using heat detectors). In rooms with sloped ceilings, install within 3 feet of the peak.
Step 2: Install the Control Panel
Mount the hub centrally, ideally on the main floor near a power outlet. Plug it in and install the backup battery per manufacturer instructions. Power on and confirm it enters pairing mode (usually indicated by a flashing LED).
Step 3: Mount the Detectors
Hold the base plate against the ceiling or wall and mark pilot holes with a pencil. Drill pilot holes using a 3/32-inch bit for drywall (use appropriate anchors for plaster or masonry). Secure the base plate with screws, insert batteries into the detector, and twist or snap it onto the base.
Step 4: Pair Devices to the Hub
Follow the pairing sequence in your system’s manual, typically involves pressing a test button on each detector within 30 seconds while the hub is in pairing mode. The hub should beep or display confirmation when each device enrolls.
Step 5: Test the System
Press the test button on one detector. All interconnected alarms should sound within 3-5 seconds. If they don’t, check battery installation, verify the detector is enrolled, or move the hub closer to extend range. Repeat for every detector.
Step 6: Register and Configure Alerts
Download the manufacturer’s app (if applicable), create an account, and link the system. Set up push notifications, emergency contacts, and monitoring services if included. Some systems need batteries from trusted suppliers, so keep extras on hand by ordering from places specializing in backup power for alarm systems.
Permit requirements vary by jurisdiction. Some municipalities require permits for monitored systems or professional inspection after installation. Check with your local fire marshal or building department before starting, non-compliance can void homeowner’s insurance claims.
Maintenance Tips to Keep Your System Running Reliably
Test detectors monthly by pressing the test button on each unit. Mark your calendar or set a phone reminder, it takes five minutes and could save lives.
Replace batteries annually or when low-battery chirps start. Don’t wait until 3 a.m. when the chirping wakes you up. If your system uses sealed lithium batteries, mark the installation date on each detector with a permanent marker and plan full unit replacement at the 10-year mark.
Vacuum detectors twice a year using a soft brush attachment. Dust and cobwebs interfere with sensors. Pop the cover off (if removable) and gently clean the sensor chamber, don’t spray compressed air, which can damage photoelectric sensors.
Check hub backup batteries every six months. Most systems alert you when backup power is low, but manual checks prevent surprises during power outages. Replace backup batteries every 3-5 years even if they appear functional.
Update firmware when prompted. Many smart-enabled systems push updates to improve reliability, fix bugs, or patch security vulnerabilities. Skipping updates leaves your system outdated and potentially unreliable.
Inspect mounting hardware annually. Vibrations from slamming doors or HVAC systems can loosen screws over time. Tighten any loose detectors and confirm base plates sit flush against mounting surfaces.
Keep a log of installation dates, battery changes, and test results. It’s boring paperwork, but it helps track patterns (like one detector eating batteries faster than others) and ensures you stay compliant with any insurance requirements.
Conclusion
Wireless fire alarm systems deliver reliable protection without the complexity of hardwired installations. They’re well-suited for DIY setup, adaptable to any home layout, and scalable as your needs change. Focus on proper placement, regular testing, and battery maintenance, the technology handles the rest. If you’re serious about home safety, this is one upgrade that pays dividends you’ll hopefully never need to collect.